Prevent 3 Agonizing Issues from C-Section Scar Tissue
C-section Scar Tissue Techniques to Stop Low Back Pain, Frequent Urination, and Painful Intercourse for Postpartum Clients
3 Agonizing Issues Caused by C-Section Scar Tissue
C-section scar tissue, when left untreated, can create complications in the body, including low back pain, frequent urination, and painful intercourse. When scar tissue forms, it can go in different directions in the body adhering to tissues and surrounding organs. It can create adhesions in the abdomen, on the colon, ovaries, or between the bladder and uterus. When left untreated, scar tissue can pull organs out of proper alignment or create adhesions resulting in pain and life-altering changes in the body.
Low Back Pain
Low back pain is one of the most common complaints resulting from C-section scar tissue adhesions. With low back pain, scar tissue usually creates adhesions in front of the sacrum, around the bladder, uterus, colon, or uterosacral ligament. The formation of these adhesions can cause a restriction in the sacrum’s mobility back and forward, resulting in low back pain.
Frequent Urination
C-section scar tissue can also cause frequent urination, even 10 to 15 years post-surgery. Scar tissue will extend from the area of the C-section and form around the bladder preventing the bladder from being able to expand fully. When the bladder tries to expand, it will hit the scar tissue and send a signal to the brain that it is full since it cannot expand more fully. If clients are complaining about needing to urinate every 15 – 20 minutes (as opposed to every 2 – 3 hours), scar tissue release work is likely, in order.
Pain With Intercourse
Pelvic pain and pain with intercourse are the most painful issues resulting from C-section scar tissue. When there is pelvic pain, scar tissue may have formed adhesions on the pelvic organs. The organs are sensitive structures, and when they have limited mobility, it will inevitably cause pain. With intercourse, the vaginal tissues and uterus need to move superiorly within the body. Deep thrusting or penetration can be very painful when scar tissue restricts this motion.
When to Treat C-Section Scar Tissue
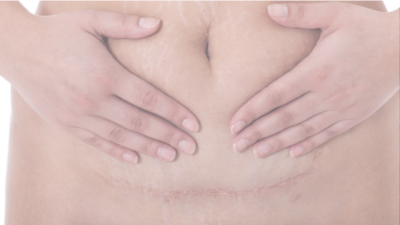
It is a good idea to treat any C-section scar tissue. Once a C-section scar is well-healed, usually around six weeks postpartum, you can treat the scar directly to help break up adhesions and increase the mobility of the tissues. It is best to treat a scar when it has just initially formed, and the skin has healed back together. The scar will look reddish in this stage as it fades to a normal flesh color with maturation. It may be itchy, painful, or sensitive as the nerve endings within the tissue heal.
Communicate with your client during treatment to ensure they are comfortable throughout the session. If a client is struggling with you touching the scar area, then have them try touching that area instead. Guide them with what they are feeling and ask them questions about what is coming up. There can be an emotional component to working in this area that your client may need support with.
With C-sections, in many cases, scar tissue continues to form for the next one to two years. When it is no longer being produced, treatment is still beneficial, but it may require a more vigorous treatment that can be painful. Again, communicate with your client to make sure they are comfortable.
How to Treat C-Section Scar Tissue
Treating the scar tissue directly is a three-layer process. You will first address the skin layer, then the muscle layer, and then the organs. Initially, the scar may be tender, red, and painful. If this is the case, working the tissues above and below is best to work around the scar. As the scar gets less tender, you can follow this procedure with your fingers on top of the scar.
Video with C-Section Scar Tissue Treatment Technique
Treating the Skin Layer
- Have your client lay face up on your table with their knees bent and feet on the table.
- Place your fingertips, so the pads of your fingers lay just above the scar line.
- Press down into the skin layer like you are playing the piano.
- Feel for restrictions in mobility on each side.
- Feel for where the scar is thicker or cord-like.
- Create little circles on top of the scar (if not tender) or above and below it (if tender) with your fingers.
- Move up and down and side to side while making circles.
- If the tissue moves down more than it does up, work in the upward direction to regain movement in that direction, and vice versa if the opposite is true.
- If the tissue moves easier to one side than the other, gently pull the skin on the side that is restricted until you feel a slight stretch in the tissues, and hold it until you feel a release or melting in the tissue.
- If the scar is not tender, after doing the up/down/side-to-side work, try to pick up the skin and roll it between your fingertips.
Treating the Muscle Layer
- After working the skin layer, allow your fingers to sink deeper into the abdomen, where you will feel the abdominal muscles.
- Assess the muscle to check for good mobility from side to side.
- In general, one side of the scar is usually less mobile than the other side. (My theory is the more restricted side is the side the surgeon stood on during the operation).
- Repeat the same movements as you did with the skin layer moving around the scar and even on top of the scar as pain/tenderness allows: circles up, down, side to side.
- Work the entire lower abdomen.
- If you feel an area or direction with limited mobility, encourage the tissue to move in the restricted direction by gently stretching the tissues where they don’t want to go and holding them there until there is a release or melting of the tissues.
- Lift the skin up towards the head to further assess for mobility.
- If there is a restriction, sink down, wait and hold to allow the muscle to mobilize under your fingers.
- Ease up on your hold when you feel a melting or release.
Treating the Organ Layer
- The organ layer is the most important layer for getting to the source of the three frequent complaints: low back pain, frequent urination, and painful intercourse.
- A bit on the anatomy: right below a horizontal C-section scar line is the small intestines where it rests on top of the uterus and bladder. The bladder sits right behind the pubic bone, the uterus behind, and a little up from the bladder.
- To reach the organ layer, it is important that your client is lying supine with knees bent up and feet on the table to allow the lower abdominal tissues to slacken.
- With your fingers, sink deeper past the muscles and locate the uterus.
- Make sure the uterus can move evenly from one side to the other.
- If it doesn’t, then take the tissue in the direction it doesn’t want to move until you can’t move it any farther, and gently hold the tissue there until you feel a melting and release under your fingers.
- Recheck the mobility of the uterus to see if it is even from one side to the other.
- Repeat treatment, again, if necessary.
Additional Treatments for the Organ Layer
- Lift the small intestines off of the scar tissue and test for mobility.
- Work in the areas where there is restriction by sinking down, waiting, and holding it there to allow the tissue to release.
- You will feel movement that feels like the tissue is dancing – follow it and let it melt and release.
- Release work to lift the uterus off the bladder and ensure proper alignment is often a necessary additional step to provide healing in this area as well and is taught in the Holistic Treatment of the Postpartum Body course referenced below.
Tip on Releasing Tissues
Your client may feel a slight burning sensation while you are working with the scar tissue. This is a normal feeling for stretching tissues, but it is important to communicate with your client and make sure you are not trying to force a release by pulling or pushing too hard on the tissues.
When releasing tissue, hold the tissue to its end range of motion until you feel a softening or melting of the tissue. That feeling is scar tissue releasing. It feels like butter melting under your fingertips.
Additional Release Work
In addition to C-section scar tissue treatments, release work on the lower abdominal fascia and organ release techniques may be necessary to fully break up adhesions from C-section scar tissue. Ideally, this release work is done both externally and intravaginally. The Holistic Treatment of the Postpartum Body is a fantastic course for any practitioner working with the postpartum body that wants to learn additional techniques to help postpartum clients overcome pain, discomfort, and dysfunctions after childbirth.
Client Tips to Help Them Heal
You can teach your clients the techniques for working on their scar tissue, so they can continue the work after they leave your office. Advise them on how to work the tissue in little circles up, down, and side to side at the skin layer, muscle layer, and organ layer. Show them how to work the restrictions and hold tissues until they melt and release.
Initially, they will need to continue their C-section scar tissue treatment practice several times a week to prevent scar tissue from reforming. They will then continue this practice every other week or once a month throughout the first two years postpartum. If restrictions frequently occur, they will need to do the treatment work more frequently or come in for another session with you.
Benefits of C-Section Scar Tissue Treatment
In addition to helping eliminate issues with low back pain, frequent urination, and painful intercourse, C-section scar tissue treatments can also increase blood flow needed for healing the postpartum body. Treatment can also help smooth out thick scars and prevent the scar from growing larger during the early phases of healing. Treatment can help organs return to their pre-pregnancy position as well by eliminating complications with adhesions.